Step #1
Sewing the wing darts.
Use a good kiting fabric such as Icarex, Toray or a 3/4oz nylon.
Dart flaps should be sewn on the back.

a) Layout the sewing lines..

b) fold it over and stitch it once..

c) fold it back and stitch the flap down.

d) A dart. Repeat on the other wing.
Step #2
Sewing the tie points on the wing leading edge.
This is how paragliders are constructed. I like it because you get lots of stitches (10 or so) into each tie point and it spreads out the pressure. The material is 3/8" ribbon and is commonly used for zipper pulls. Cut 36 6mm pieces to begin with.

a) Fold & stick 5 ties to double stick
tape.
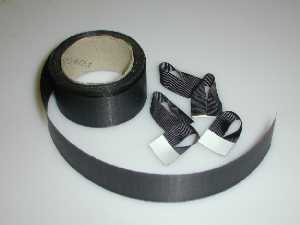
b) Cut the ties loose. Get some 1" slit
ripstop.
c) Layout the spacing points, stick
the ties down, then stitch the ribbon
on top of that.
TIES & RIBBON ON BACK.

d) This can be a bit tricky - roll the
ribbon over twice and stitch it down
again. Gets easier with practice.
RIBBON NOW ON FRONT.

e) The finished edge. Tre sexy.

f) Repeat on other side.
Step #3
The lower wing trailing edge.
These seams might be considered overkill, but they add strength and durabilty to the perimeter of the kite - useful if it's going to be dragging/crashing.

Sew 1" ribbon on the BACK of the
bottom edge of the lower wing.
(the long skinny section)

Double roll the ribbon and sew it on
the front.
Step #4
Attaching the upper & lower wings.
- Start in the center
- ribbon on bottom, then lower wing (small) then upper wing on
top.
- front side facing front side.
- leave extra 3-4" at the end.

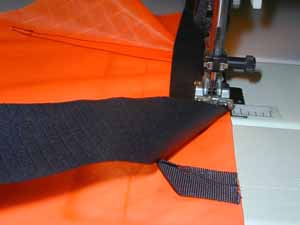
a) Pancake the layers together and
stitch once.

b) Straighten out, roll the ribbon over
as always, stitch again on back.

c) leave 3-4" tails. Repeat other side.